
Starting a drive in OMX takes two screens: pick a map, then pick a bus. Both read straight from your OMSI 2 installation, so everything listed is your own content, add-ons included. These screenshots are from a recent development build, so the layout will still change, but the information on them is what OMX knows about your content before you load anything.
The map picker
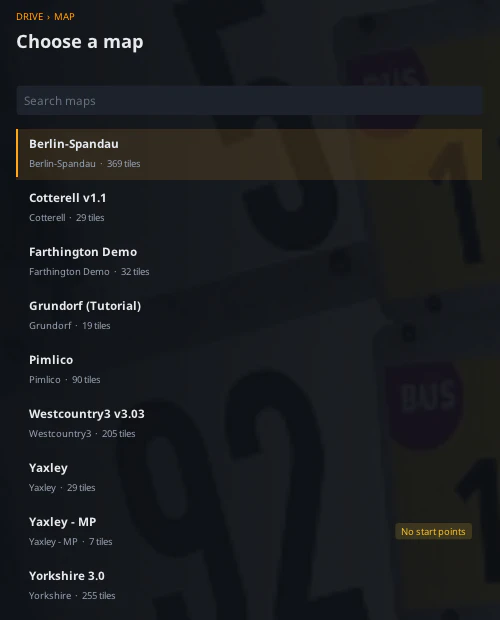
Each map in your installation gets one row: its name, its folder and how many tiles it has. On our test machine that’s the two maps that ship with OMSI 2, Berlin-Spandau and Grundorf, next to add-ons like Cotterell, Westcountry3 and Yorkshire 3.0. There’s a search box at the top for when the list gets long.
Select a map and the details appear next to the list:
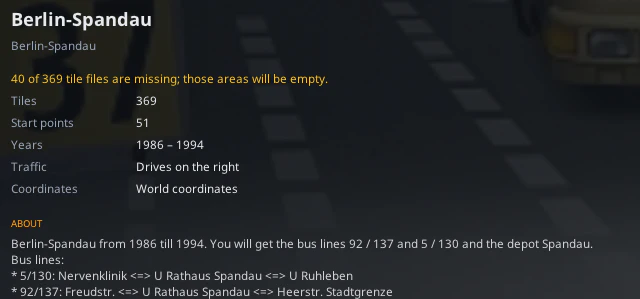
- Tiles and start points: how big the map is, and how many places you can start a drive from.
- Years: the period the map is set in. Berlin-Spandau covers 1986 to 1994.
- Traffic: which side of the road the map drives on.
- Coordinates: whether the map uses world coordinates.
- About: the map’s own description, exactly as its author wrote it.
Two things in there save you time.
If tile files are missing, you find out here rather than halfway down a route. On this install Berlin-Spandau says 40 of 369 tile files are missing; those areas will be empty. That points you straight at an incomplete install before you’ve spent ten minutes loading.
And a map with no start points gets a No start points tag in the list, like Yaxley - MP above, so you know before you select it.
The vehicle picker
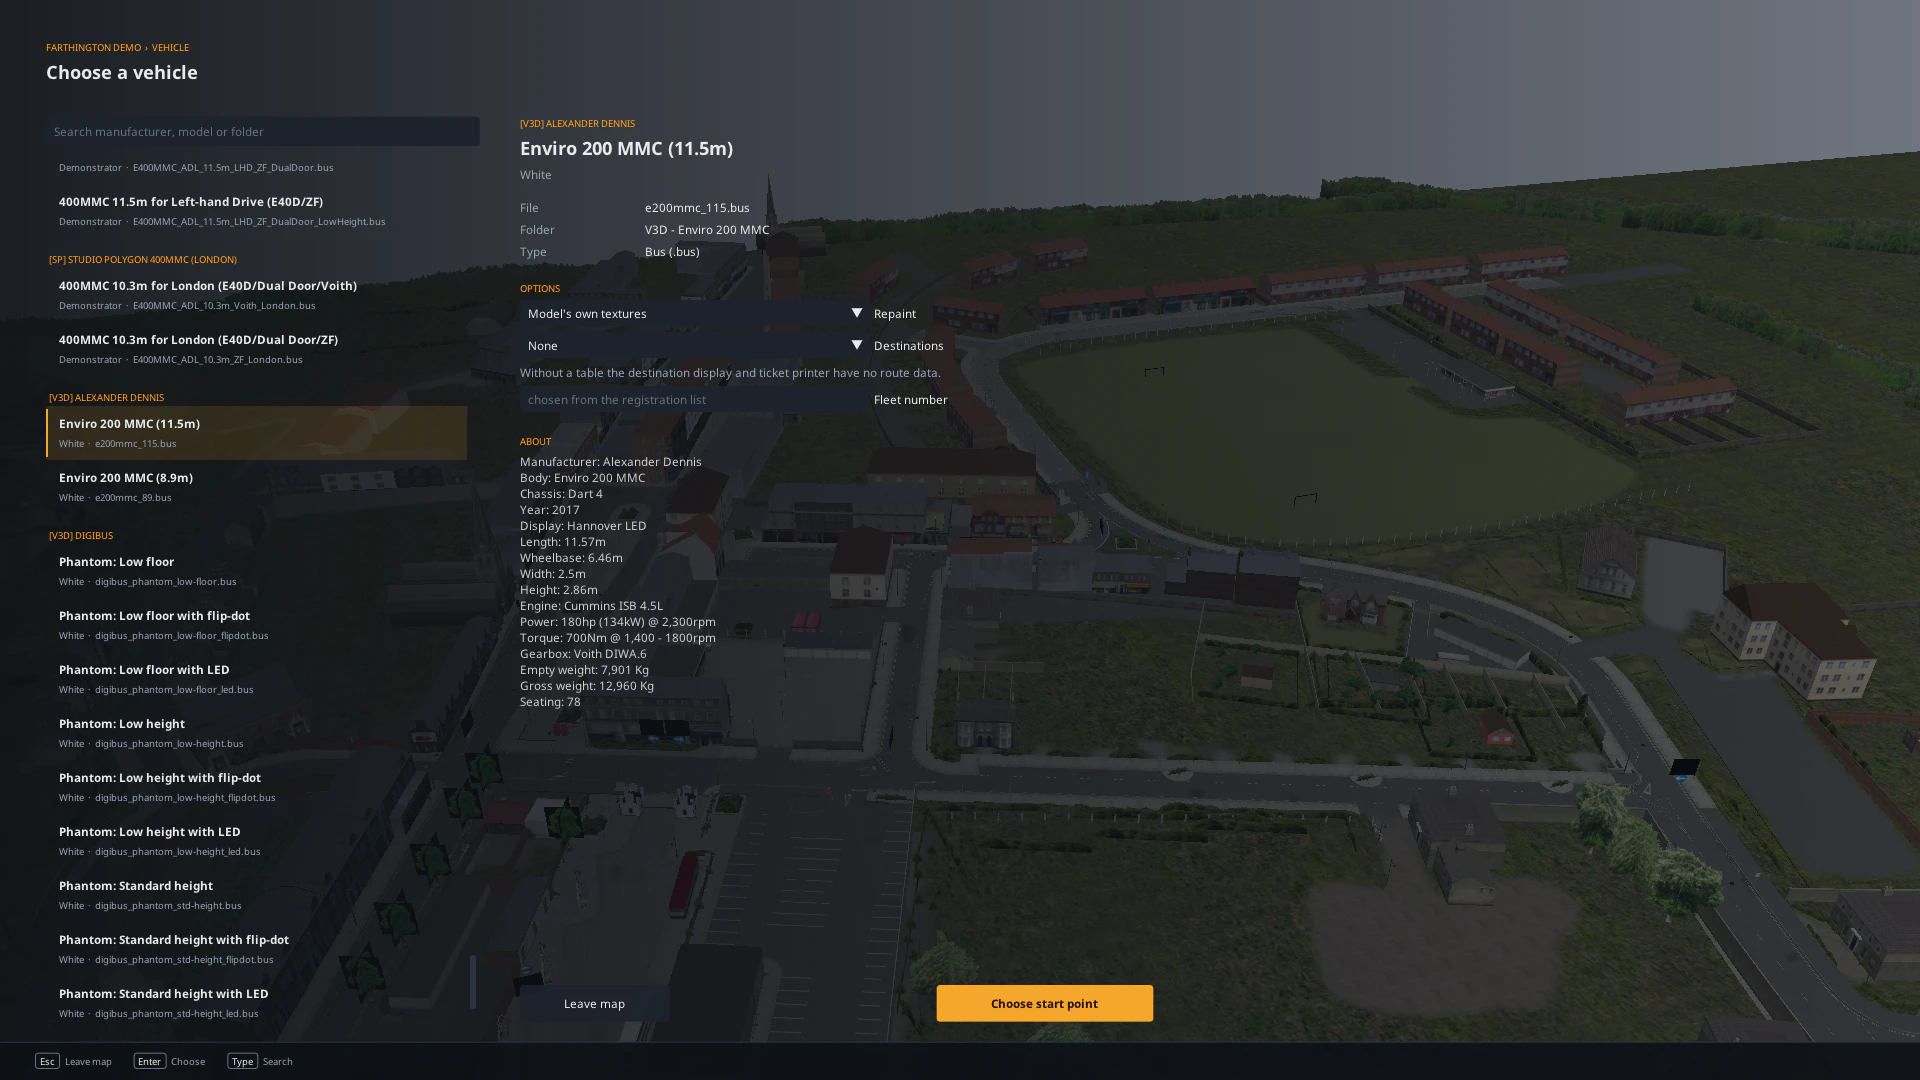
Buses are listed under headings such as [V3D] Alexander Dennis and [SP] Studio Polygon 400MMC (London). Each entry shows the model, its repaint and the .bus file it comes from. The search box matches a manufacturer, a model or a folder name, which helps once you have a few hundred buses installed.
Select one and you get:
- File, folder and type: exactly which file is about to be loaded. Here it’s
e200mmc_115.busfrom the V3D - Enviro 200 MMC folder. Useful when you’ve got several versions of the same bus installed and can never remember which one works. - Repaint: the model’s own textures, or another repaint from the list.
- Destinations: the destination table to use. Leave it on None and, as the picker warns, the destination display and ticket printer have no route data.
- Fleet number: chosen from the bus’s registration list.
- About: whatever the author put in the bus’s description. For the Enviro 200 MMC that runs from the Cummins ISB 4.5L engine and Voith DIWA.6 gearbox down to its 78 seats.
Choose start point moves on to placing the bus. Leave map goes back to the map list. The keyboard works throughout: Esc to leave, Enter to choose, and start typing to search.
Still a development build
Nothing on these screens is final. Expect the layout to move around between builds. What won’t change is the approach: the pickers show what’s actually in your OMSI 2 folder, and tell you when something’s missing instead of leaving you to find out on the road.